Tuesday, 4 August 2015

Front Inner Wing Repairs


So, I have finally found the time to remove all of the poorly fitted repair panels from the front of the car.  You can see below a trial fit of the wing to see the panel will fit with the wing and bonnet.


Here is a mock up with both wings fitted, this has highlighted some critical issues that the wings were different heights and the bonnet did not fit.  This can be adjusted during the assembly.


Here is the driver side top repair panel and front curved panel welded in place.  This took a lot of checking with the nose clamped in place to ensure a good fit with the bonnet.


 Here is the passenger side stripped down to reveal later rot issues that require attention.


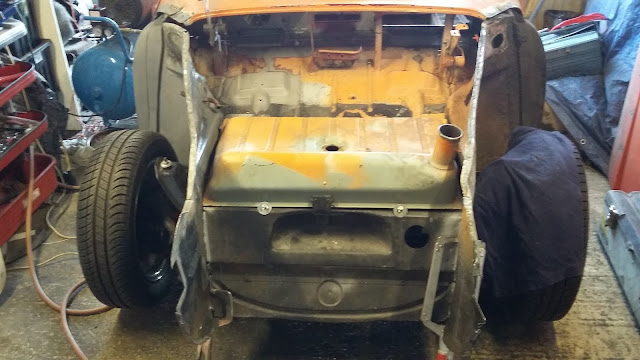
Below is the finished panels in place, and fuel tank in to ensure it fits.  Next job to take it off the chassis again to get everything up front blasted and painted.


Sunday, 1 March 2015

Removing the Karmann Ghia nose


Here is the drivers side wing with the air intake boxes removed.  You can see that there is rot and the panels are barely welded together.  The other side was just as bad.....


OK, so with a little it of work, carefully grinding out welds the front panel is off.


On closer inspection, the bad workmanship continues so I also removed the inner wheel well panel.


OK, so here we are with very little left.  It is likely I will remove the top side repair panels as well.
Whilst this is all open, I will prep the whole are and get a it in etch primer.

Monday, 23 February 2015

Replacement Nose and inner wing panels including fresh air intake vents


Haven't been able to work on the car for a while, but got some free time and decided to remove the patch underneath the fresh air intake box.

Previous repairs on the car have been carried out pretty poorly, and I imagine here is no different.


As suspected, rot left under the patch, and this probably passes up into the air intake box as well.

The whole of the front of the car has been replaced with new panels quite poorly, and to top it off the bonnet is a bad fit.

So I have decided that I should remove all of the repair panels on the front of the car and refit properly.


Luckily enough, all of the panels have been welded with very poor blobs of weld that can be carefully cut without damaging either panel.

Here is the long fresh air section removed.


Saturday, 18 October 2014

Upper Front Inner Wing Repair


Before I fit the wing, I want to make some sort of panel to bring the inner wing and door pillar up to the wing.

I am not sure how this would have been originally, but as the wings and the top 6 inches of the inner wing were replaced by someone previously, I must assume this was just left.

At the same time, I may close up the petrol tank filler hole and breather pipe as the car came with a tank that is filled from lifting the bonnet.

Sunday, 12 October 2014

Door Pillar to wing panel repair


The panel fitted between the door pillar and the wing is prone to rot at the bottom.  I haven't managed to find a replacement that I can buy, so decided to make it myself.


He is a close up of the rust.  Making a repair here is pretty tricky.  I started by making a template in cardboard and then shaping the metal slowly.


This repair took me at least 4 hours to make, but in am pretty pleased with the result, and it fits really well.


Sunday, 7 September 2014

Front Inner Wing Repairs continued


I made the panel in the photo and welded it in place whilst the other panel was in place so that they would meet in the middle.  This panel is not an easy one to make as there is a curve to it.  I ended up making it in two bits to make it easier to fit.


Here is the front edge panel now tacked in place.  Both panels have been deliberately left oversize so that they can be cut back together for a neat finish.


And here is the finished job with the welds ground back and some zinc sprayed on.


I noticed from some on line sources that the ends of the outer sill should have a plate in place to close it off, so I cut one to fit prior to welding the door pillar bottom in place.


Thursday, 4 September 2014

Front Inner Wing repairs


OK, so I have carefully removed the various patches over rust, most of which are close to the door pillar.  The bottom of the door pillar has had quite a few little rubbish patches welded all over the place.  However I found you can get a great little repair panel for this as shown below and it is not super expensive.


To replace the bottom of the door pillar outer, it seemed easier to remove the wing to door pillar closure panel by carefully drilling out the spot welds.  This panel has some rot on the bottom, so I will need to fabricate a repair section for this as well.


Here is the finished area with all of the patches removed.  From here I have trimmed out all of the rust areas and trimmed the bottom of the pillar on the outside to fit the repair panel in.


A lot of head scratching to decide the best way to get a good tight fit and keep as much original as possible.  Not a job to rush here as the joints need to be as tight as possible.

However, not going to weld this on yet as there is a repair to complete on the inner skin.


Here I am making a repair panel in one length for the corner here.  I have used a joddler to get a flush finish n the outside, and this will put the repair overlap on the inside.

I have not cut the outside of the panel to size yet as I need to make a repair panel(s) for the inner wheel arch to meet this panel.


The panel in place including the door pillar bottom clamped.

I am not a metal fabricator, but I am very happy with how this is working out.  All of the work on this has only really taken about 6hrs so far.